Be ready to CPU mine on Digibyte with RandomX and your Rock64 ARM with XMRig

Technical leading expert concerning datacenters, cybersecurity, administration and project management, including : Managed Services Provider - PaaS, SaaS - Clouds & Datacenters - CyberSecurity & Network Architecture - B2B, B2C, B2E tailor-made or custom Services and Softwares - Backups - GIS - Driving external Support Teams
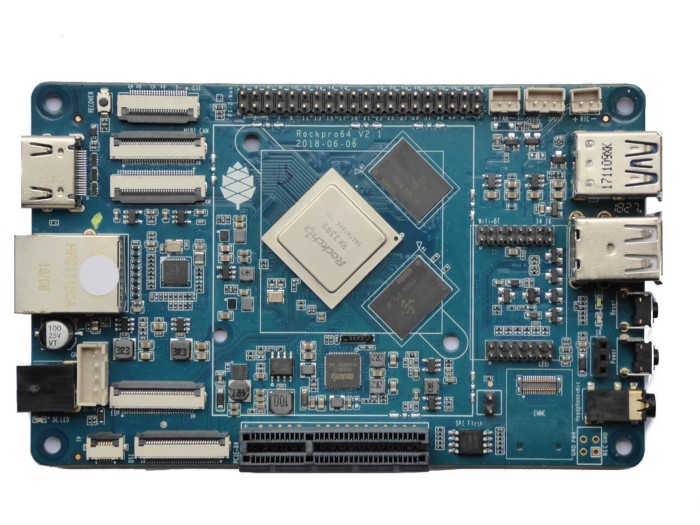
The Rock64 has a Quad-Core ARM Cortex a53 64-bit that you could easily be used to catch few more $DGB Digibyte wants to bring back CPU mining implementing RandomX lowering more the barrier to mine Digibyte and get started without any kind of “commitment”. Be ready and prepare your ARM device to grab few more $DGB! In one of the last stories we learned how to install your Rock64 and how to create a DigiByte Full node with a Rock64. Now you’re standing with this brand new node and wondering if you could make it mine some $DGB? Or simply, you just own a Rock64 and are wondering why it wouldn’t mine a bit, yes every coin count! Here is a small step by step guide.
CPU mining are you serious?
Why not? The Rock64 is powered by a Quad-Core ARM Cortex A53 64-Bit Processor, you have this amazing bit of technology just sleeping in this small box next to you. All this asset of silicon you paid good money for without using it… what a shame…
Make it mine !
And it is just so easy to make it mine, you are few commands away, so why not doing it? First just download the right dependencies:
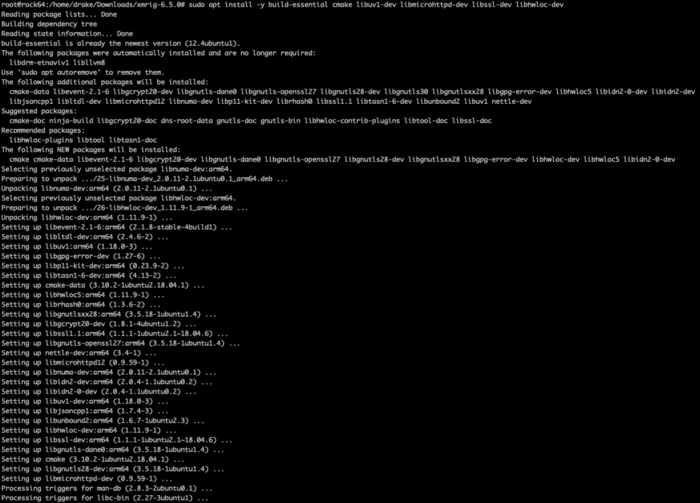
Install dependencies
sudo apt install -y build-essential cmake libuv1-dev libmicrohttpd-dev libssl-dev libhwloc-dev automake libtool autoconf
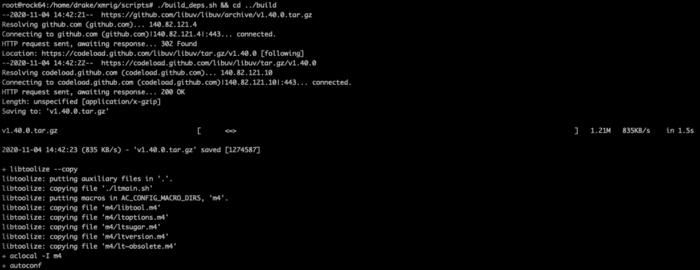
Download the sources
Choose the best place to host your sources. In my opinion your home folder could be the right place. In the next commands, you’ll move into your home folder and simply download the XMRig sources. That will create for you an xmrig folder.
cd ~
git clone https://github.com/xmrig/xmrig.git
###Remove donation settings before building XMRig By default a donation to the XMRig’s devel team is set in the donate.h file. As we are CPU mining and won’t receive a lot of coin, you should disable this functionality. Edit the donate.h file located in the src folder to remove donation by simply using nano this way:
nano xmrig/src/donate.h
To remove automatic donations built into XMRig simply put a 0 at the end of those lines:
constexpr const int kDefaultDonateLevel = 0;
constexpr const int kMinimumDonateLevel = 0;
Make a CTRL+X and Y to exit and save the file and you are good to go.
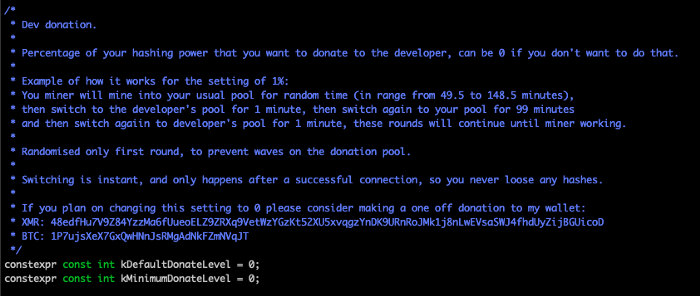 Put 0 at the end of those lines and save
###Create the build destination folder and compile [1] So we are ready to compile, just follow those commands and wait for each one to complete:
cd ~
mkdir xmrig/build && cd
./build_deps.sh && cd ../build
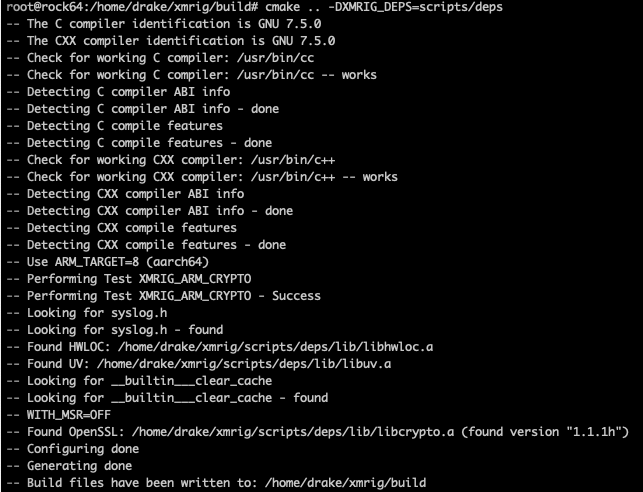
sudo cmake .. -DXMRIG_DEPS=scripts/deps
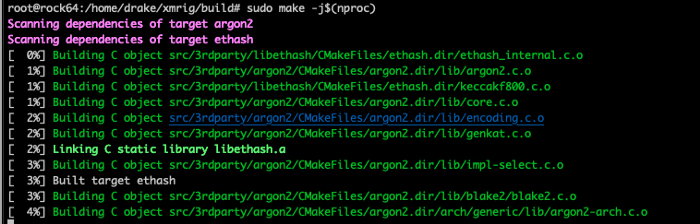
sudo make -j$(nproc)
 Screenshot taken during the build part
###Change ownership on the folder you created
chown -R <name_of_your_user> ~/xmrig
###Enable HugePage support is very important thing for almost all supported CPU mineable algorithms. With RandomX, you can earn until 50% increase in CPU mining hash rate by enabling Huge Pages on your device [2]. Please note 1280 pages means 2560 MB of memory will be reserved for huge pages and become not available for other usage. You can use this command to make it temporary:
sudo sysctl -w vm.nr_hugepages=1280
If you want to make it permanent:
sudo bash -c "echo vm.nr_hugepages=1280 >> /etc/sysctl.conf"
sudo bash -c "echo kernel.shmmax = 2684354560 >> /etc/sysctl.conf"
sudo bash -c "echovm.hugetlb_shm_group = 0 >> /etc/sysctl.conf"
###Test it If you want to test it to be sure that you’ll be ready when RandomX will be available, you can create a Monero Wallet and test it against a miningpool of your choice or you can also test it with my address to test it if you want :
sudo ./xmrig -a randomx -o stratum+tcp://pool.minexmr.com:4444 -u 42SNM6kfbbD697cBmv67jddCymSyVpq6bK5iVooghJzY1xEfH5eyj9vHeeu5acpQDGLmnjGgJeNewWfTKAd19A1b61PZDnW+25000

##Benchmark the perf of your Rock64 This simple command will let you benchmark the CPU mining performance of your Rock64
sudo ./xmrig --bench=1M --submit
It will take few hours to complete and return you a link to xmrig.com wit all your results. If you want to compare yours with mine, here is my link.
##Create the config.json file The config.json file will set your CPU miner for you whenever you launch it. Just create a file called config.json in the same folder of the app xmrig and insert the following lines.
cd ~/xmrig/build
nano config.json
To finish, just save with CMD+X and CMD+Y.
Overclocking the Rock64
Beware this part is for information and testing only, keep in mind that you can break your board depending on what you’re asking it for or if it overheats. Use it with caution and buy a heatsink. By default your Rock64 has a max CPU frequency set to 1.3GHz max. Check your current CPU frequency with:
cpufreq-info -c 0
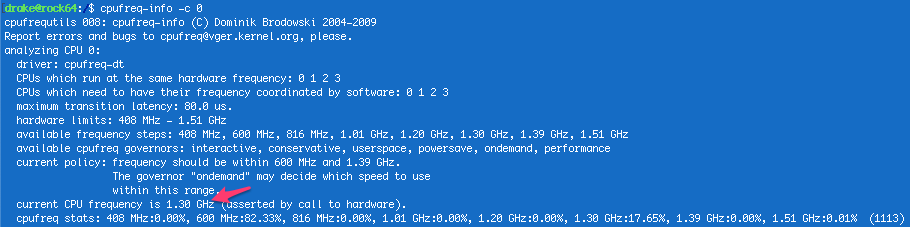 Actually this Rock64 can go up to 1.30GHz
You can directly notice the bump in KH/s (about 15% more hashes).
If you want to try different settings, you can get the list of the accepted frequencies by using this command:
cat /sys/devices/system/cpu/cpufreq/policy0/scaling_available_frequencies

Rock’s available scaling frequencies
If you like to go back to the previous settings, just use these commands (beware to replace the “ with the right quotation mark
sudo sed -i "s/MAX_SPEED=.*/MAX_SPEED=1296000/" /etc/default/cpufrequtils
sudo systemctl restart cpufrequtils

#Check the temperature of your Rock64
You can check the CPU temperature with this command:
sudo armbianmonitor -m

>87.7°C is too hot for you CPU, you better aim for 79°C max
I don’t have a big enough heatsink on my CPU and the 1512000 max-speed setting was a bit too much, so I did choose 1392000 setting which my Rock64 seems to appreciate much more.
#Graphically monitor your Rock64 with SSH and s-tui
s-tui is a terminal, graphical User Interface for monitoring your computer.It allows monitoring CPU temperature, frequency and utilization. It is developed in Python and also requires minimal resources and it is possible to run it through a SSH connection.
It is pretty straightforward to install, just enter these commands to install and detect the sensors:
sudo apt-get install lm-sensors sudo sensors-detect
Say yes to all questions and carry on with these commands that will install s-tui:
sudo apt-get install python3-pip stress sudo apt-get install python3-dev sudo -H pip3 install — upgrade setuptools sudo -H pip3 install ez_setup sudo -H pip3 install s-tui
Now it has been installed, to launch it:
sudo s-tui ``` If you want to have all the information, you have to run s-tui with sudo.
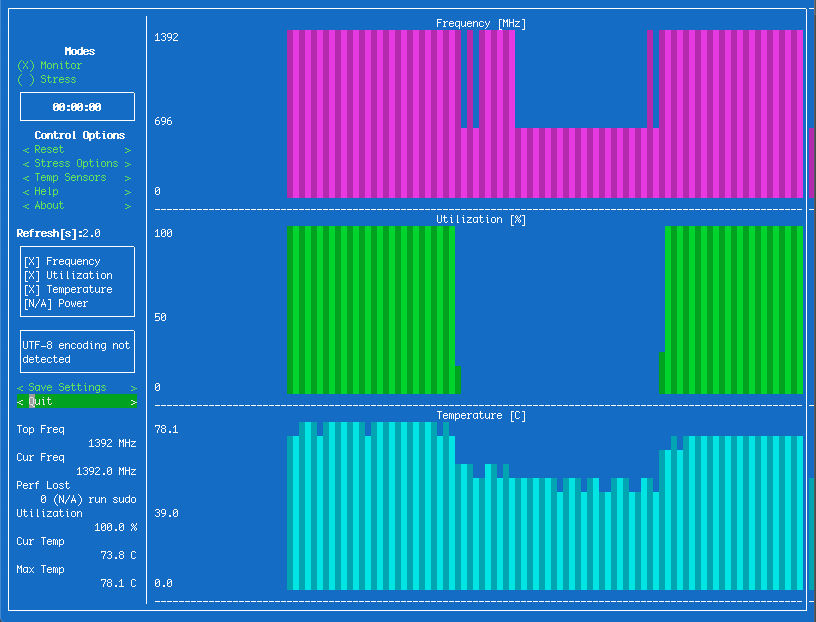
Too bad the Rock64 has no Power sensor